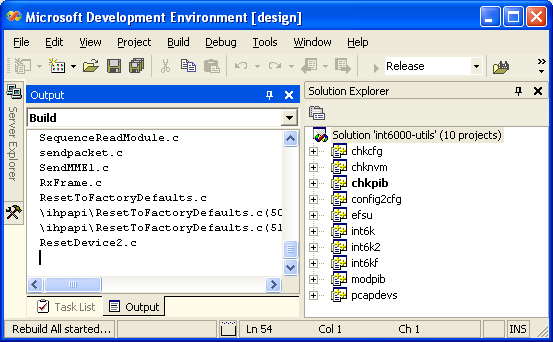
To build the Open Powerline Toolkit on Windows XP, you must have access to a Windows computer with Visual Studio .NET 2003 and WinPcap runtime libraries installed. WinPcap is an open source version of the packet capture library, libpcap, widely used on Linux and OpenBSD systems. It is readily available on the Internet. Installation of these components is beyond the scope of this document.
The Windows and Linux versions of the Open Powerline Toolkit use the same code base but the Windows version requires a Microsoft solution file that includes special compiler settings and specific POSIX header files. The solution file and header files are included in the same archive as Linux version.
Use an application like WinZip to extract archived files into a build folder of your choice. Use Windows Explorer to locate solution file .\VisualStudioNET\plc-utils.sln under the toolkit root folder. Double-click the file to open it with Visual Studio .NET. In Visual Studio .NET, open the Solution Explorer window and observe a display similar to that shown above.
Figure 1 illustrates a Visual Studio .NET window with the Solution Explorer pane exposed. In the Solution Explorer window, right-click the plc-utils solution and select the Rebuild menu option. Compiliation should begin. Watch for comilation errors.
On successful compilation of all projects in this solution, you should find executable programs in the Release folder under each project folder. If not then look in the Debug folder, instead. You can now open a console window, change to each Release or Debug folder in turn and run the programs located there. Instead, we recommend that you create a Windows Installer package by right-clicking on the Install project in the Solution Explorer window and selecting the Build menu option. Compilation should resume.
On successful completion of the install project build, you should find the Windows Installer file plc-utils.msi in the VisualStudioNET folder above the install project folder. Double-clicking on this file will start the Windows Installer program.
To distribute the toolkit package to other Windows computers, copy the Windows Installer file to a public network share or some type of portable media.
